Children love discovering how to make a K'NEX catapult! The creativity involved in this building toy allows for exciting cognitive stimulation, it keeps kids well-engaged in their activities, and it offers a gratifying feeling of pride and accomplishment once they've completed their fun challenge. If you are trying to help your child build a K'NEX catapult, read on for some useful tips.
Discover How to Make a K'NEX Catapult
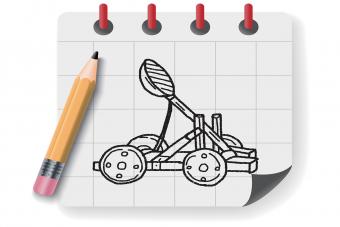
K'NEX help kids build all kinds of gadgets, figures, and buildings by applying their inherent ingenuity. Listed below are some simple steps to help guide your children in building their K'NEX catapult. These guidelines were made available by Instructables. Feel free to visit the site for guidance pictures as well.
First Step
Gather together the following K'NEX materials and tools:
- Connectors
- Three single-slot connectors
- Two double-slot light gray connectors
- Two double-slot orange connectors
- Four triple-slot connectors
- Five five-slot connectors
- Rods
- Two blue rods
- Three yellow rods
- Two gray rods
- Four red rods
- One small green rod
- Wheels
- Two medium-sized wheels
Second Step
In this step you will build the base-axle of the catapult. Align one of the red rods through one of the 5-slot connectors. Center the five-slot connector, attaching additional five-slot connectors on each side of the centered one. Following this, attach one single-slot connector per each side of the five-slot connectors. Place the two wheels on each end of the rod and subsequently close it off with the remaining two orange double-slot connectors.
Third Step
In this step you will assemble the throwing arm. To do this, connect the remaining rods and connectors (with the exception of the small green rod and one of your triple-slot connectors) into a traditional K'NEX throwing arm. Attach the throwing arm, which should consist of four right-triangles, to the base-axle connecting the free rod endings to the centermost five-slot connector of the axle.
Final Step
This final step includes building the ammunition and completing your catapult. Use the remaining triple-slot connector as an "arrowhead" and place the small green rod within its center slot. Attach your newly-constructed ammunition to the opening at the end of the firing arm. Ensure that the end attachment is well-centered and balanced to allow for a precise firing. At this point, releasing the ammunition is possible. Simply aim and thump down on the opposite end of the firing arm, but be careful not to direct the toy at anything you could potentially hurt or damage.
Great K'NEX Building Sets for Everyone

Along with many other building toys on the market, there are numerous different K'NEX sets available for purchase. Choosing the right one is a matter of determining what level your child is at. For beginners, try the 30 Model Building Set. It includes in-depth plans for 30 models and plenty of parts for children to develop their own unique designs. The 50 Model Building Set is a fantastic kit for intermediate and advanced builders. Along with thorough instructional plans for 50 different models, this kit carries 481 parts, including a battery operator motor for operational mobile models. For even more suggestions visit Buildingcraze and decide which set is best suited to teach your child how to make a K'NEX catapult.